

Don’t buy any more disposable cotton facial rounds. With this DIY washable facial rounds sewing tutorial, you will learn how to sew these beautiful reusable ones yourself. It is a really quick and easy scrap buster.
Like I mentioned before, simplifying our lives made us also rethink our use of disposable products. Me using cotton facial rounds every day to remove my make-up and clean my face was not helping. The alternative, washable facial rounds are so easy to make. And this project is also a fantastic scrap buster.
DIY washable facial rounds instructions
What fabric to use
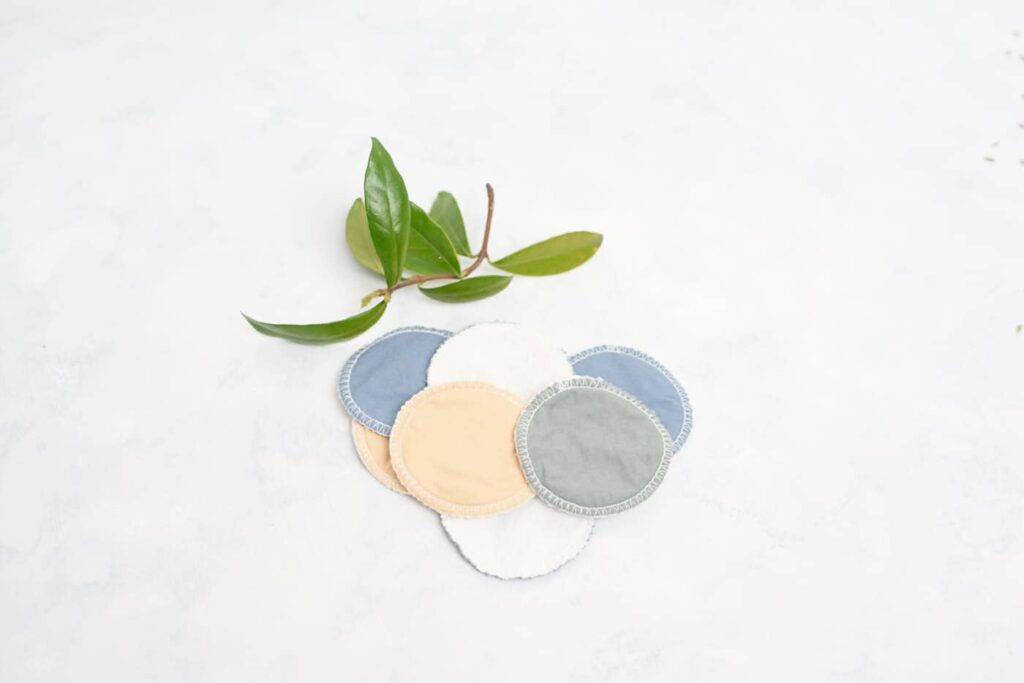
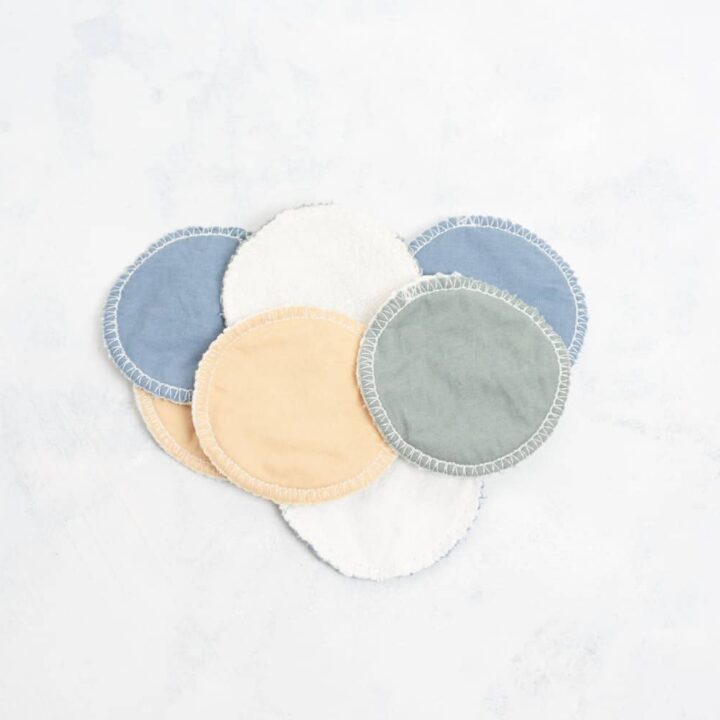
You can use different kinds of materials for these washable facial rounds. I like to use a cotton or linen top side of the facial round. You can pick and choose any colour or design for this top layer. You can use any scraps of woven fabric you have laying around
Or you can try and find a nice woven fabric that coordinates well with for example your bathroom decor.
For the bottom layer, or the layer that you actually use to clean your face I have tried different fabrics. For my first set, I used regular terry cloth. It works, but I found them a little rough especially around my eyes.
Next up was baby terry cloth and flannel. I decided to try them both and I have to say I like them both a lot. However, if I really do have to choose I would go for flannel. Flannel is the softest and most kind to my skin.
Shape and size

They are called facial rounds, so shape wise that should not be a question ;-). But low and behold you can make them square-shaped as well. Or any other shape you can think of.
I do like the round ones, but shape-wise you can choose whatever you prefer.
Size-wise I started with a diameter of 10 cm. These are really great for cleaning my face. For removing my eye make-up I prefer a tad smaller, about 7 cm in diameter. I really like to have a variety of sizes to choose from in my bathroom.
You can also let your decision about the size be made by the diameter of the glass you use to trace the outline of the facial round onto the fabric.
Materials
- A small amount of baby terry cloth or flannel
- A few pieces of cotton
- Coordinated thread. I have used white for all of them. I like that it blends in with the flannel side of the facial rounds, and the contrast on the top side.
- Glass or something round to use to trace the outline onto the fabric
- Fabric scissors
- Sewing machine
DIY washable facial rounds – sewing step by step
1. Draw circles
A lot of circles :-D. Offcourse this can depend on how much scrap fabric you have. Besides that it will also depend on how many facial rounds you use per day. I like to have a generous stack of them in my bathroom.

Another thing you might want to consider is how many layers you want to use in one facial round. I have tried with one and two layers of flannel. For cleansing purposes, they both work fine. I do like the feel in my hand of the rounds that have a double layer of flannel.
Single layer or double layer, you can also let the amount of fabric decide for you. After drawing all the circles, cut them out so you are ready for the next step.
2. Put the top and bottom layers together
A really simple step put the flannel bottom and the cotton top layer on top of each other. Make sure you have the right side of the fabric towards the outside.
You can either clip or pin the layers together.
Don’t forget to take an extra layer of flannel in between if you want slightly thicker cotton rounds.
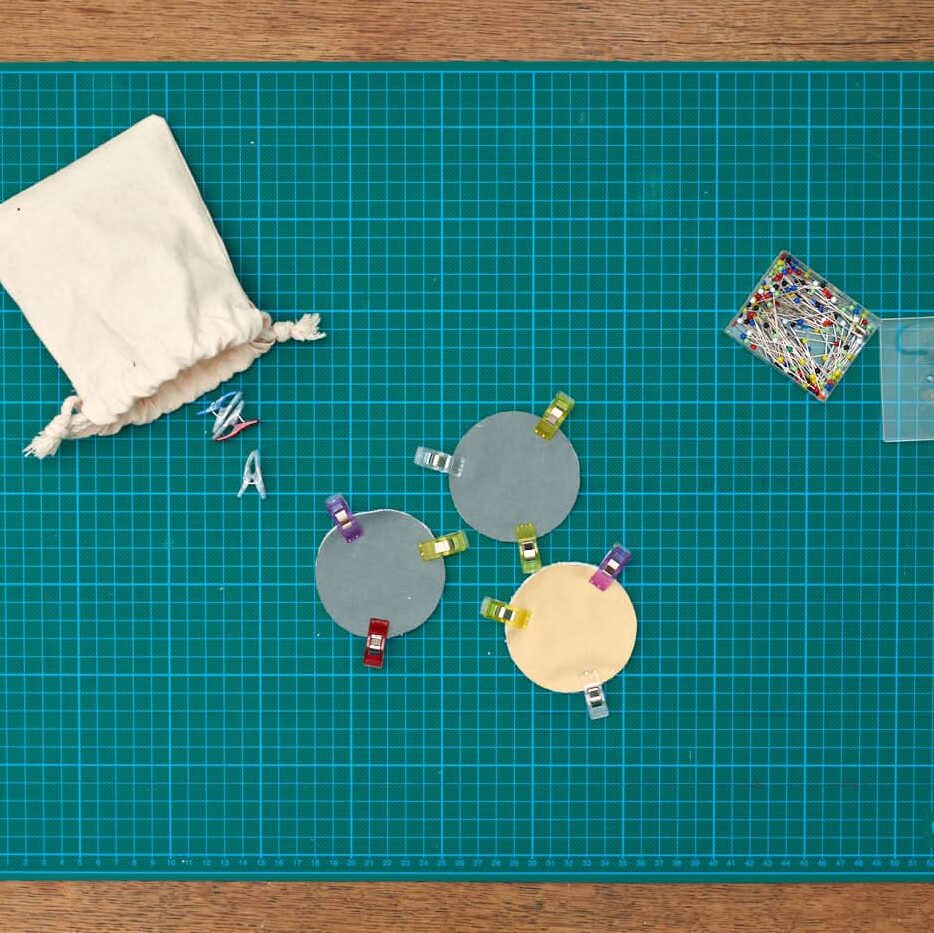
3. Sew
The last step is simply sewing the facial rounds. You can use a zig zag stitch or like you can see in the picture I like to use an overlock or overcast stitch. To get the best result for this, you should use the overlock/overcast foot on your sewing machine.

Tips for using your homemade cotton rounds
- Use two layers of flannel to get a nice thickness in the facial round
- Use a laundry net to make sure the facial rounds do not get lost in the washing machine
- Wash without fabric softener, this is better for the environment
- These facial rounds make a perfect small but attentive gift
Other DIY reusable products
Are you interested in using less diposable products in your home and life. Do check my other simple sewing projects for reusable and washable products.
Environmentally friendly reusable, fold-over snack bags
Reusable kitchen sponge (coming soon)
Pin it for later or share it with your friends

Printable instructions for DIY washable facial rounds
Washable facial rounds
Materials
- Flannel or baby terry fabric
- Cotton or linen
- Coordinated thread
Tools
- A glass or cup to trace the outline of the facial rounds
- Fabric scissors
- Pins or clips
- Sewing machine
Instructions
- Draw the circles on the fabric. Use a cup to trace the outline of your facial rounds
- Pin or clip the top and bottom layers together.
- Sew all around the edge of the facial round. You can use a zig-zag stitch or like you can see in the picture an overlock or overcast stitch.
Notes
- Use two layers of flannel to get a nice thickness in the facial round
- Use a laundry net to make sure the facial rounds do not get lost in the washing machine
- Wash without fabric softener, this is better for the environment
- These facial rounds make a perfect small but attentive gift